Need more help?
Go to the help overview.
|
Overview
With our Organiseme for Gmail add-on users can convert a mail in Gmail directly into a task in his / her Organiseme account. Mails often contain action items or must be followed-up. With our Gmail add-on user's can turn such emails with two clicks into a task so that they can manage this task as part of all their tasks - and so they never forget to follow-up an email. . In the following the installation of the Organiseme for Gmail add-on is explained. For a description how to use the add-on please refer to the dedicated usage manual. Step 1 - Initiate installation from Gmail
In order to install the Organiseme Add-on for Gmail please click on the plus symbol (+) on the right side in Gmail. Then a dialog box will be opened in the front containing the G Suite Marketplace for Gmail Add-ons is. 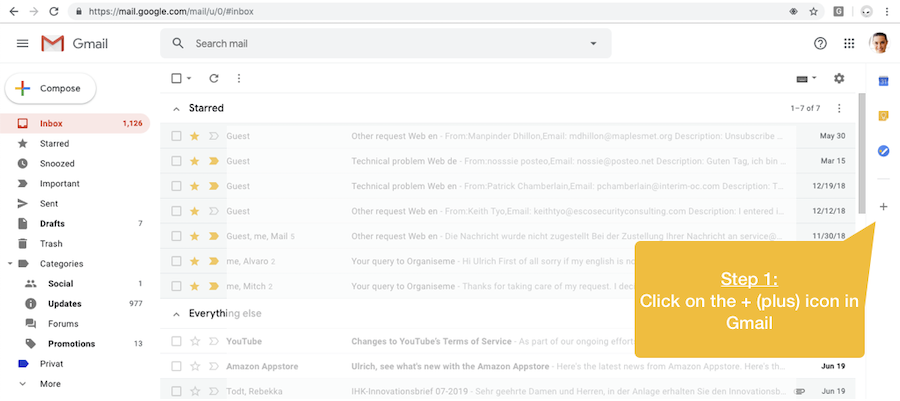
Step 2 - Search for Organiseme in G Suite Marketplace
Since Organiseme is not (yet) one of the top Gmail add-ons the best way to find the Organiseme for Gmail add-on is to enter "Organiseme" directly in the search field on the top. 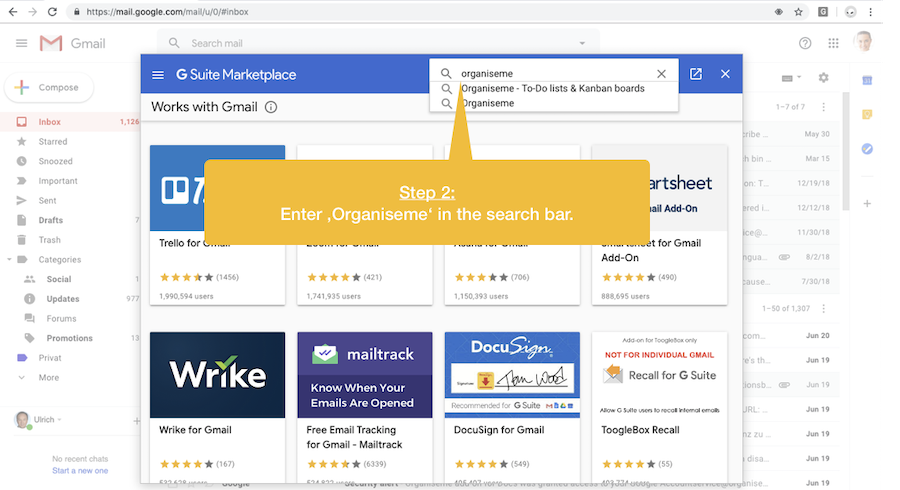
Step 3 - Select Organiseme add-on
There should be one search result displaying exactly the Organiseme add-on for Gmail. While the Organiseme application and the Organiseme for Docs add-on is also listed on the G Suite marketplace it will not be shown in the search result when you initiate the search from Gmail. Then the search is filtered for Gmail add-ons. 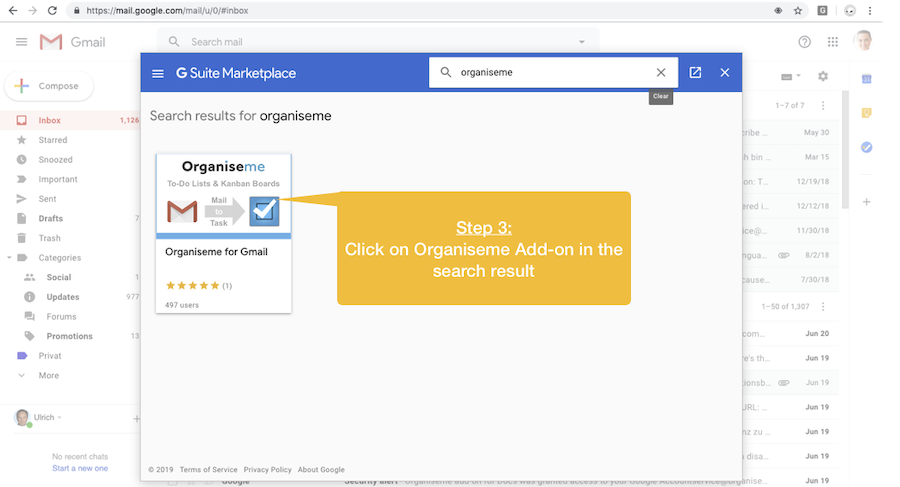
Step 4 - Install Organiseme add-on
Now the listing page of the Organiseme for Gmail add-on in the G Suite marketplace is displayed where you find a description as well as several screenshots of the add-on. To start the installation click on the INSTALL button. 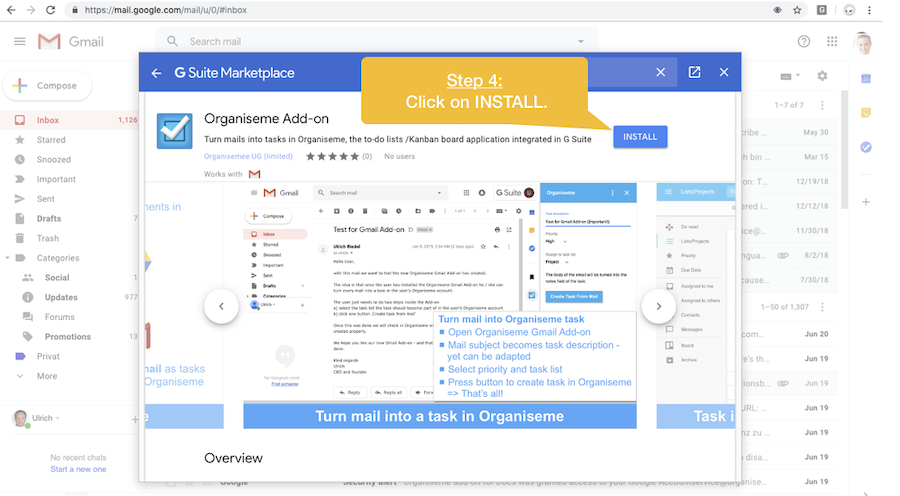
Step 5 - Information about permissons
Next a small dialog box will appear informing you that you need to grant the add-on some permissions in order to take information from a mail and synchronize it to Organiseme for creating a task there. When you are okay with this please click on the CONTINUE button. 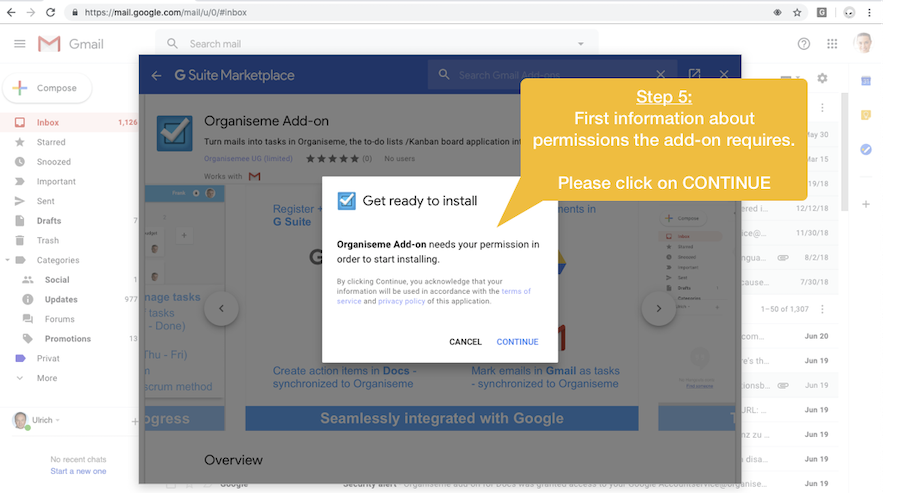
Step 6 - Choose Google account
in the following dialog box you need to select the Google account you want to install the add-on for. Please select the Google account that you used for registering with Organiseme. 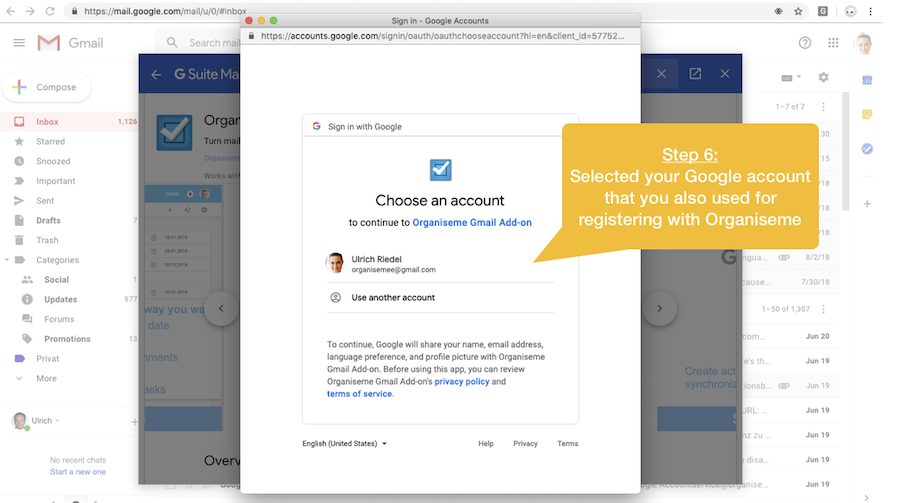
Step 7 - Add-on asks for access rights
Now the different accesses and actions the add-on will perform on your data are listed. In order that the Organiseme for Gmail add-on can be installed you need to click the 'Allow' button and grant the add-on access to these actions. 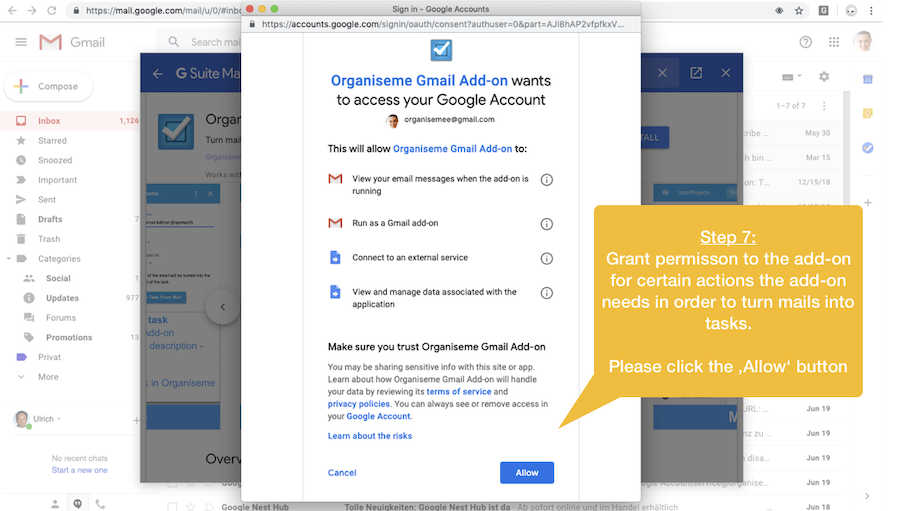
Step 8 - Add-on successfully installed
Congratulations - you have successfully installed the Organiseme for Gmail add-on. Now you can turn mails directly from Gmail into tasks in Organiseme. You can close the dialogbox. 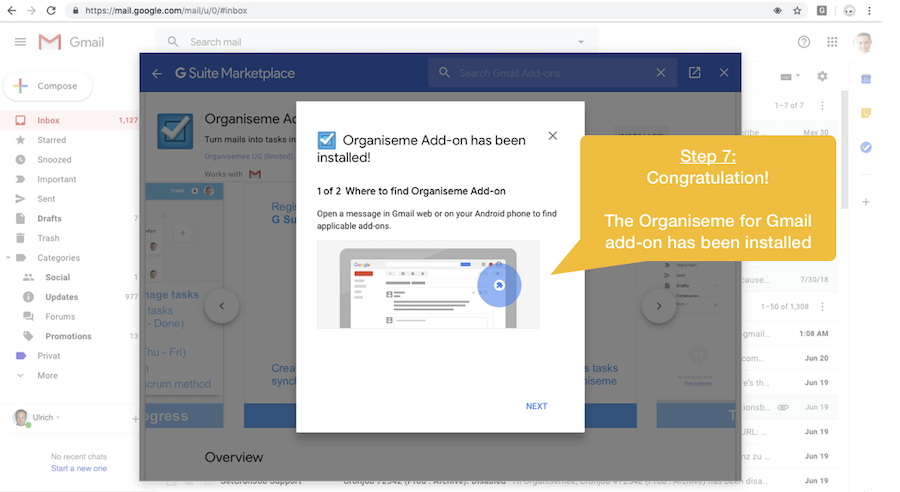
Step 9 - Organiseme icon logo displayed
Once the dialog box has been closed you will see the Organiseme logo on the right slide, just underneath the Google icons and above the plus icon where you have initiated the installation of the add-on. 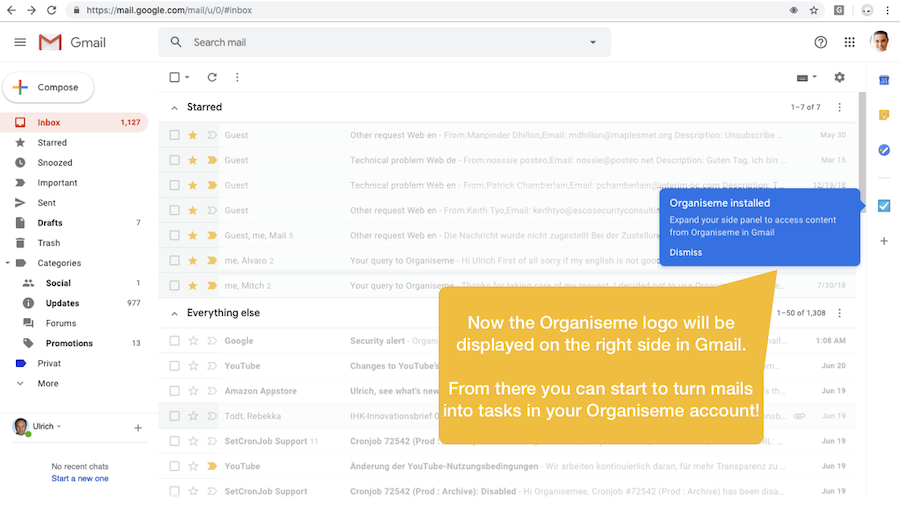
. See our usage manual when you want to know how to turn a mail into a task. |