Go to the help overview.
|
Contacts are basis for collaboration
Organiseme supports you in collaborating with others - either within your family, your team or within your company. In Organieme the people you collaborate with are called contacts. You can either collaborate with individual contacts, or you can create teams that consist of several contacts. Contacts and teams are managed in the Contacts / Team view that is part of the main menu. Contacts are synchronized between the web application and the mobile apps. No contacts yet
When you open the Contacts / Teams view for the first time, and as long as you have not added at least one contact, the "My Contacts" page does not list any contact yet.. In order to add contacts you can click on the "Add contact" button on the bottom or go directly to the "Add Contacts" tab. How to add a new contacts is described here. 
Contacts are listed
Once you have added at least one contact you will see the contacts are listed in a table style on the "My Contacts" page. All contacts are listed with profile photo, first and last name, their email address and finally their status. The status of a contact can be:

When you have send out a contact request the person is already listed in the "My Contacts" tab with status = red = Unconfirmed. Once the person confirms your contact request, the status will be changed to green = Confirmed. Send message to contact
You can send the contact a message directly from within the "My Contacts" page. Just move the mouse above the contact and click on the menu icon on the right. Then a small menu will appear where you need to select the "Send message" entry. 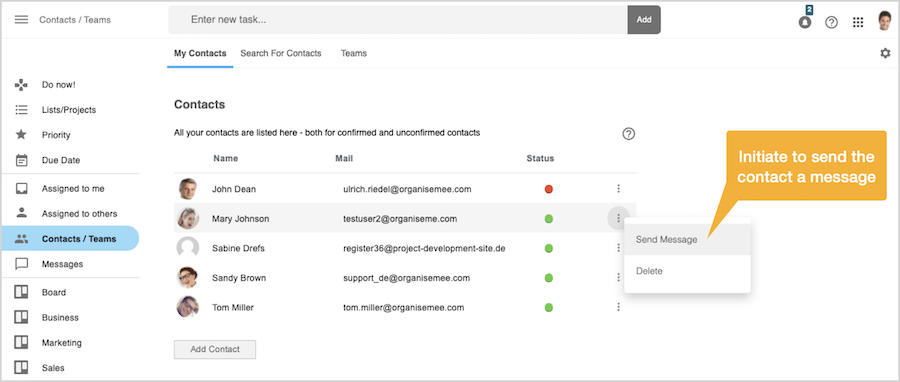
A small dialog box appears in front where you can enter the message for the contact. 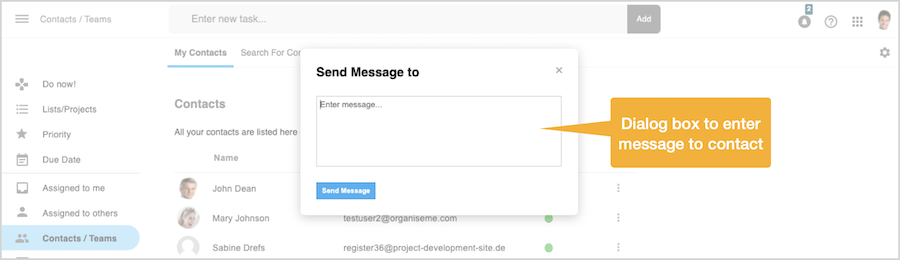
When you click on the "Send" button the message will be send to the contact and the dialogbox closes again. The just send message can also been viewed in your Outbox in the "Message" view. Delete contact
In case you want to delete a contact you need to move above the contact and click on the menu icon on the right. In the small menu that appears you need to select "Delete contact".< , meaning that you stop collaborating with this person. 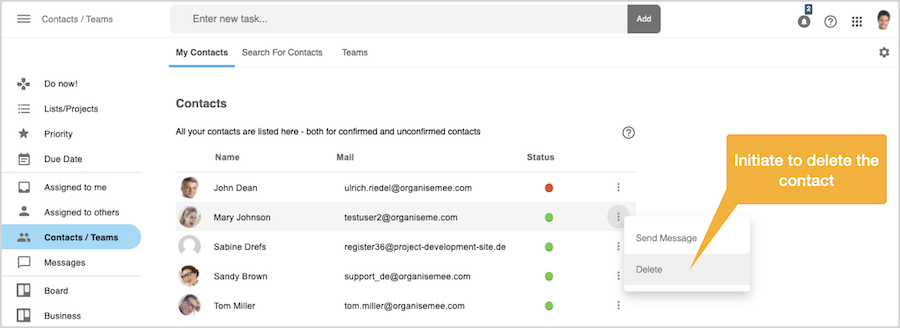
Then an alert box will appear in front where you need to confirm the deletion. 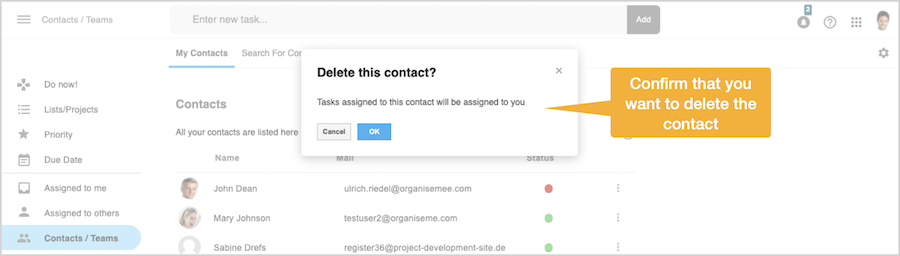
All tasks that are currently assigned by you to this person will be re-assigned to you, and all tasks this person has assigned to you will be re-assigned to the person. |