Go to the help overview.
|
Edit task
You can change an existing task in every view and in every tab, where ever the task is displayed. The different elements of a task can be changed as described in the following: PriorityYou can change the priority by clicking on the priority star. The color will change from grey to orange to red, and then back to grey. The colors represent the following priorities: - grey = low priority When you are in the priority view, the task will be removed immediately from the current priority tab after changing the priority. DecriptionTo change the description, you need to double-click on the description text. Then, the font of the text changes, and you can edit the description. Whenever you are ready, you just need to click outside, and the text will return to the normal font. Due dateWhen clicking the existing date, or the calendar icon when there is no due date yet, a mini calender will appear, where you can set or change the due date by clicking on the appropriate date. If necessary, you can browse to the required month or year to select the correct due date. 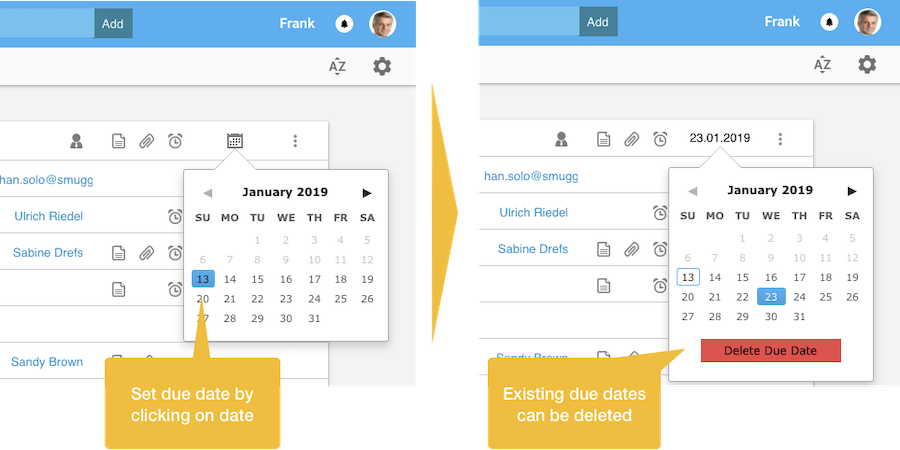
ReminderWhen there is already a reminder set the reminder icon (the clock symbol) is permanently displayed. In case there is no reminder set yet the icon appears once you move the mouse above the task. By clicking on the icon a mini calendar will appear. Here you can set the reminder date (independently from the due date) as well as up to three times on this date underneath the calendar. You will receive a mail reminding you on this task on the selected day and time. When you have added two or three times you will also receive two or three reminder mails. 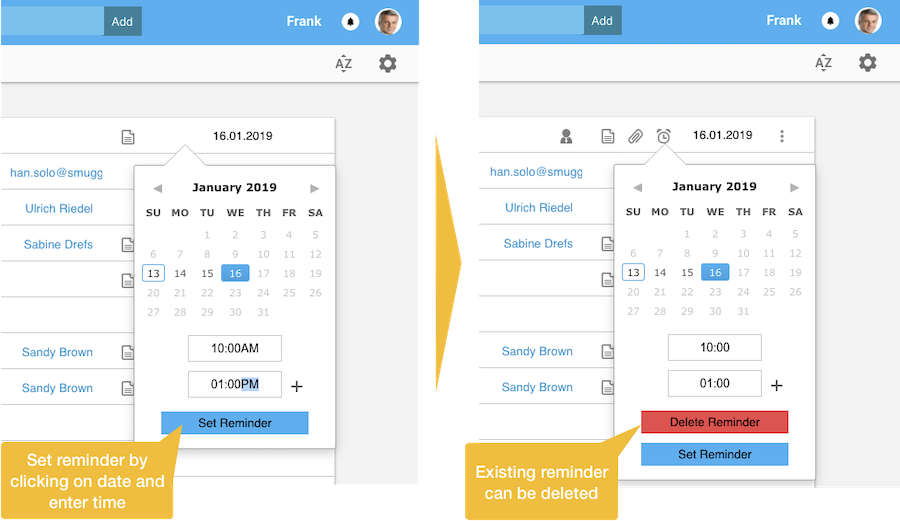
AssignementIn case the task is not yet assigned you can assign a task to one of your contacts by selecting the contacts name in the dialog box that appears once you click on the person icon. In case the person is not yet an Organiseme contact you can also enter a mail address and assign the task to any person - this person will then receive a mail with the task description. In case you have already assign the task to a contact you need to call the task back. Then the task is back in your responsibility, and you could assign it to someone else. When you have received and accepted a task assigned to you by another person you can give this task back. For more details about assigning tasks please refer to the collaboration section. ListTo move your task to another list you need to open the task menu by clicking on the three dots on the right. In the task menu all task list are displayed, and so you just need to select the new task list. When you are in the list view, the task will be removed immediately from the current list. 
NotesWhen there is already a note created the note icon (the page symbol) is permanently displayed. In case there is no note created yet the icon appears once you move the mouse above the task. By clicking on the icon a section underneath the task description will appear by pushing the next task further down. To create a note the user needs to enter the note in the large text entry field. In order to store the note you need to click the 'Save' button. This closes the note section underneath and the note icon will now be displayed permanently. 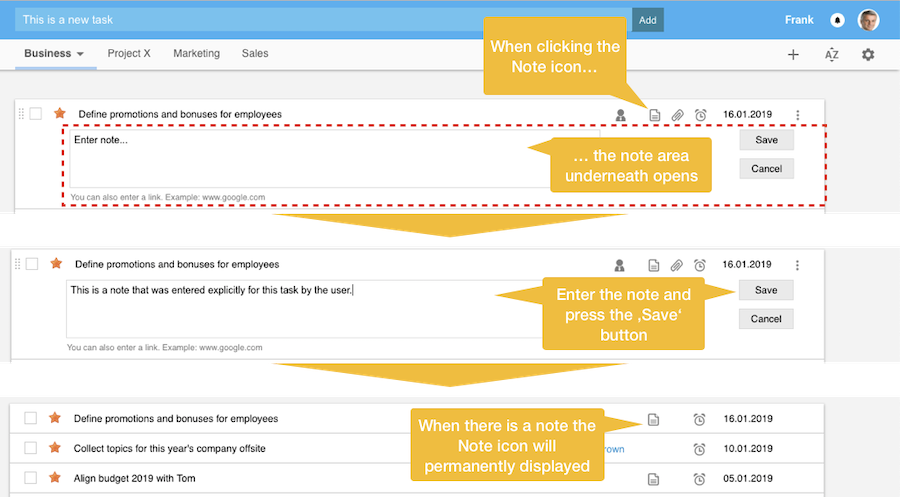
In order to edit the note just click on the notes icon to open the notes section. Then press the 'Edit' button to enable the editing mode. Now you can change the note. Once you are done just click on the 'Save' button. 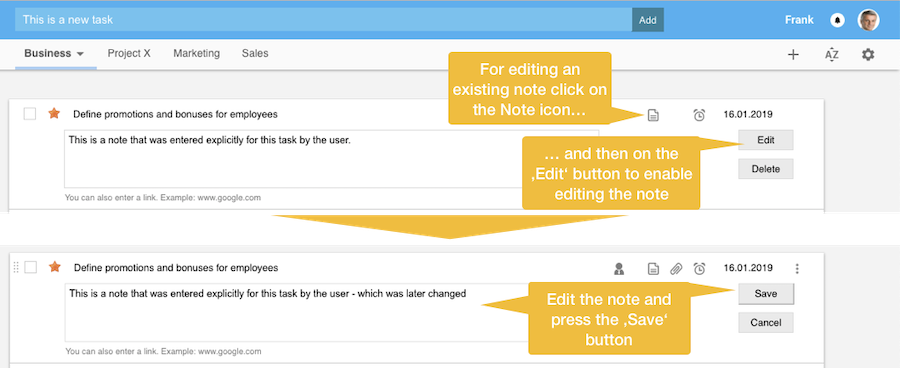
For deleting the note just click on the notes icon to open the notes section. When you press the 'Delete' button the note section will be closed, and the note icon will not be displayed anymore permanently - and the note is deleted. 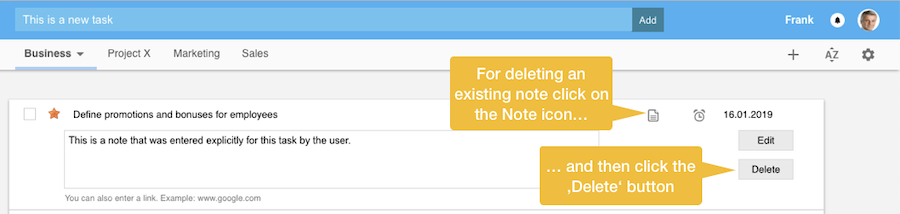
AttachementWhen there is already one or several attachment(s) for the task the attachment icon (the staple symbol) is permanently displayed. In case there is no file attached yet the icon appears once you move the mouse above the task. By clicking on the icon a section underneath the task description will appear by pushing the next task further down. You can attach up to 10 attachments which are displayed by their file name. There are three buttons: - Choose from Dropbox 
When attaching a file the document is stored either in Dropbox or in Google Drive. In both cases the file does not need to be already in Dropbox or Google Drive - you can upload it directly from within Organiseme. In Dropbox this is part of the standard Dropbox dialog box that opens once you click the "Choose from Dropbox" button. For Google Drive there is a dedicated button to attach a file that is already stored in Google Drive. And there is a button for first uploading a file to Google drive - and then the link is automatically stored as the task's attachment. You can open each attachment by clicking on the file name And you can delete each attachment by moving the mouse pointer above the file name. Then a cross appears on the right of the file name. When clicking on this cross the link to the file is deleted from the task. 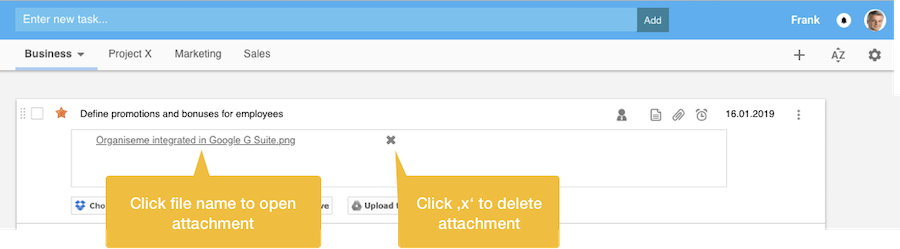
|